Thursday, April 14, 2011

Featured: Inspired Creations Contest on Elizabeth Anne Designs


So excited to post the link for our 'secret' project today! There was a lot of work and fun had putting together this shoot, we had a ton of help and good friends who came along and supported us- thank you all so much! We'll definitely be posting 'outtakes' from the shoot in the upcoming weeks... but for now, head over to Elizabeth Anne Designs' blog and vote for/view our entry! (plus check out all the other amazing entries there and on The Sweetest Occasion blog- they're amazing!)

Wednesday, April 13, 2011

Midwest Wedding Garland Tutorial

Hello lovelies,
Super excited that our 'Midwest&Sons' styled shoot will be featured tomorrow for the Inspired Creations Contest- we'll post links as soon as we can... in anticipation of that though, we're posting a bit of a teaser tutorial of one of the decorations we used for our shoot... enjoy!


Midwest Wedding Garland Tutorial:

Needed:
-Several stacks of miniature cloth doilies, in varying colors of white/ivory (you can pick these up at craft stores or, like us, discover stacks of them that were about to be thrown away and snatch them up because we knew we could do something fabulous with them!)
-A skein of natural colored yarn
-Large needle
-Starch, iron, ironing board
-a little bit of time


Cut your yarn to your desired garland length. (remember to cut it a bit longer than you want your garland to be, so you have some length to tie at the ends with) Knot one end of your yarn to the needle and start threading your doilies onto the yarn. We wove in and out of each doily at least twice to insure that the doily would lie flat on the string. Keep stringing your doilies (in alternating shades of white) till you read your desired length. Knot the ends to tie off your garland.  You can string a whole bunch of doilies and have them bunched to make a ruffly garland, or stretch them out to create a simple, sweet garland. (what we decided to do) If you stretch them out, we recommend you starch and iron each doily to give them a bit of structure so your garland isn't a floppy mess! And you're done, so simple and so pretty!


(sorry for the iphone photos- we didn't have enough time to make an official photo shoot out of the tutorial!)


Wednesday, March 30, 2011

Away for the moment...

We have many plans for our blog, updates, projects, behind the scenes sneaks, but currently, we are in the middle of an exciting and giant project... last week we styled and shot our entry for the Inspired Creations Contest (held by Cyd from The Sweetest Occasion and Elizabeth over at Elizabeth Anne Designs) and it has been a blast, but a huge undertaking... plus, its due this Friday! (lots of late nights and hours in Photoshop for Emily!)

A huge thanks to all of our friends who came out and rocked the shoot, were patient with us, helped set up/and or tear down: the amazing and fun Burke family, my sister Olivia, Isaac and Jonathan, and a big thank you to Kristi D. who was the provider of our beautiful cake!

So please forgive us during our absence, we'll be posting photos of this project as soon as we are allowed to, and we'll have updates, parties, tutorials... so much to come, but for now, its late nights of editing and sorting and 'oohing & aahing" over our entry!

Tuesday, March 22, 2011

Features

I know we're just getting started with posting over here... but in the meantime, check out a couple Paper&Velvet events Hannah B and myself have had the honor of having featured at some lovely design and occasion blogs! (at the time, Paper&Velvet, our new brand, wasn't fully decided upon, so all of our features are just listed under our personal names and my photography site/blog!)

Just recently, our New Years Eve Masquerade was featured over at Bliss! 


And a few months back our Buenos Noches Dinner Party from September 2010 was featured on one of my favorite blogs, The Sweetest Occasion:


Pretty exciting! Definitely take a look at the above blogs, as we spend hours scoring them for inspiration and just to look at all the beautiful photographs!

Eat. Drink & Be Merry. A Dinner Party Club Event. Part II, The Details

The overall feel for "Eat.Drink&be Merry" was a midsummer's eve sort of look... lush summer greens, twinkling lights, cut glass and fresh garden edibles. Some of our decor choices and inspirations were gleaned from this site. We had originally planned on using pears as our place cards since Hannah’s parents had a pear tree… but a sneaky raccoon decided to foil our plans… so we purchased green apples. 


we used garden greenery (Rub barb, Hasta leaves, Mint, Lemon Grass, Ivy, Morning glory vines…) to adorn the tables
 
Our glassware and place settings were a combination of vintage, thrifted and our combined family collections
 
We stuck with a general theme of green and white, a light summer feel. Tissue paper rosettes, chandelier crystals, white twinkle lights, clear cut glass…
 

The event was a major success... and was the start of an exciting adventure for Hannah and myself, as we are now venturing into our own Event Design & Styling business. More events and photos to come, and stay tuned for more details on our budding company, Paper&Velvet!

Photography by Emily O Photography
Styling and design by Paper&Velvet 

Eat. Drink & Be Merry. A Dinner Party Club Event. Part I, The Invites

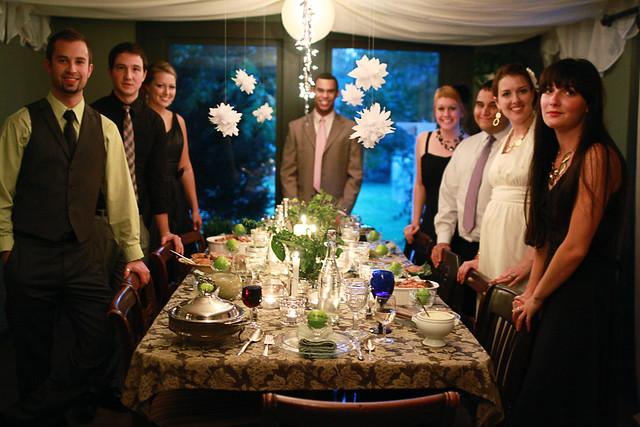
"No one throws real parties anymore!" A friend of ours recently bemoaned, and we agree.

It was just last summer that I was lamenting over the fact that living in the MidWest, there's not a lot of chances to photograph stylish and beautiful events to Hannah (my creative partner in crime)... and from that conversation, the Dinner Party Club was born.

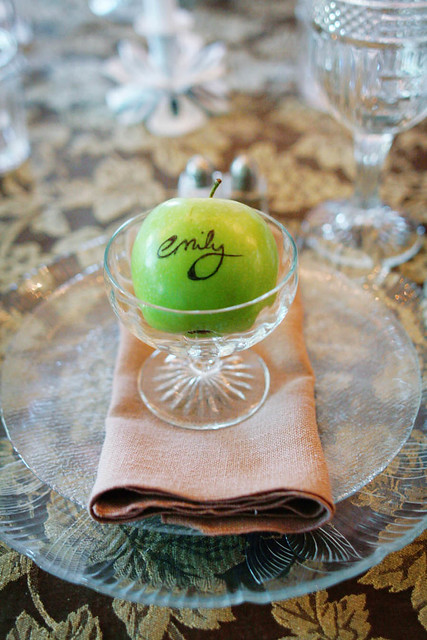
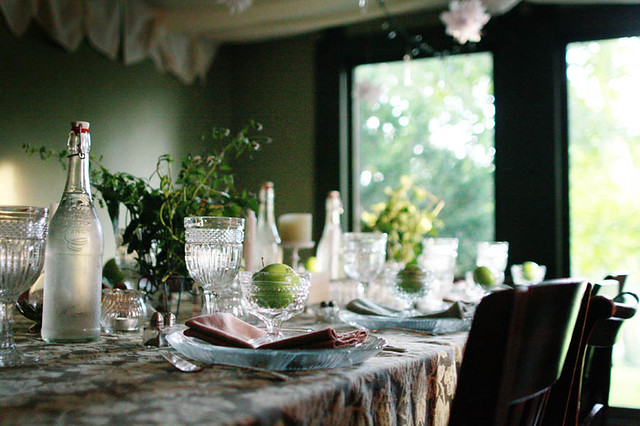
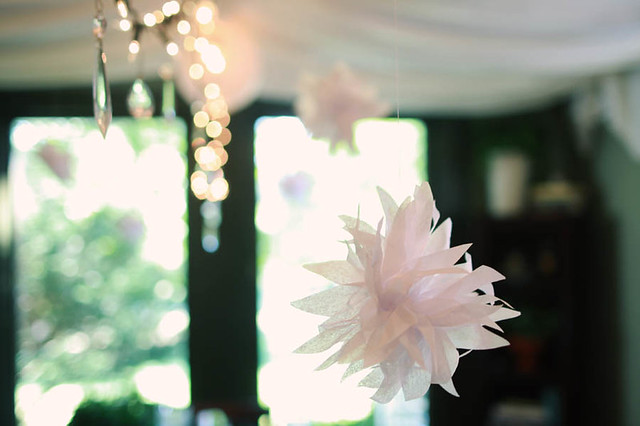
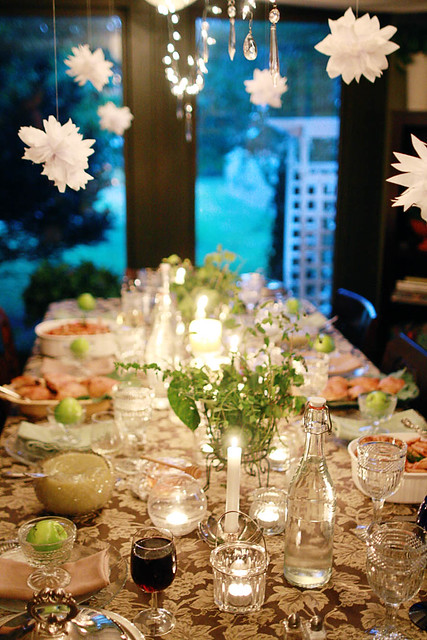
If we were not to be invited to fabulous events and parties, then we would create our own. Taking care to invite people who would not only enjoy attending, but embrace the entire concept of a dress code, elaborate details, delicious food and an unforgettable evening.

I think we started seriously planning in early June, we set our date for August 20th. Hannah’s parents have the most gorgeous house and they graciously allowed us to host our party there. There were so many stages to the planning, but first and foremost, we needed to get the invites out to our guests!


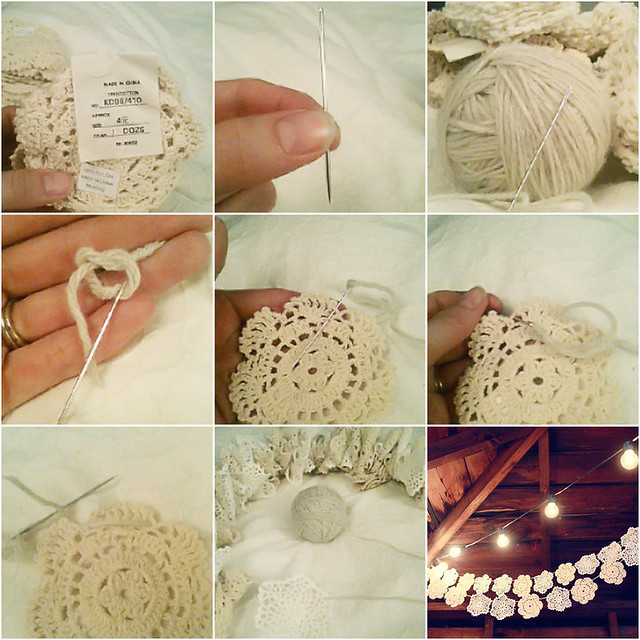
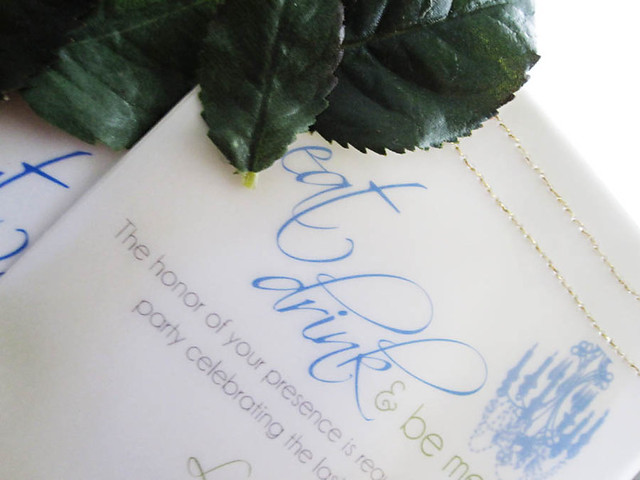
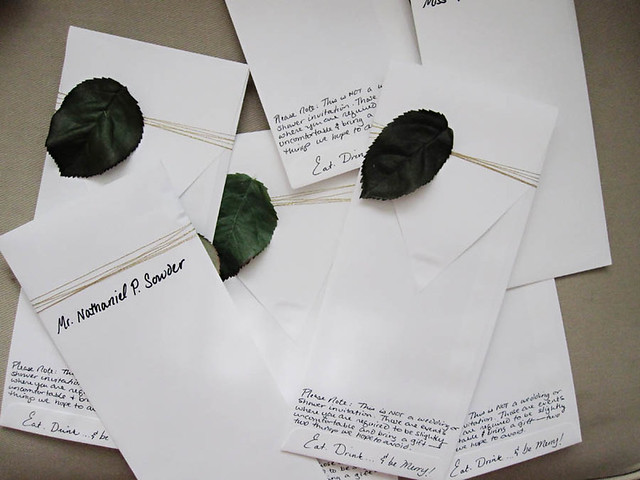
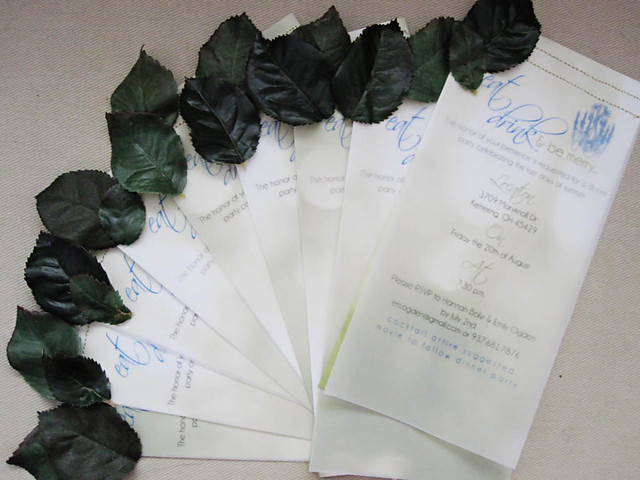
We kept the party size fairly small, which allowed us to put hand-done elements into the invites. I designed the invitations in PS, printed them on vellum, and used one of my photographs as the back layer. We then stitched them with gold thread and hot glued on silk rose leaves. We purchased the vertical envelopes at a small stationary store, hand-wrote little disclaimers to take the formality down a notch. We then finished them with more gold thread and silk rose leaves.
 
 Styling and Invitations by Paper&Velvet
Photography by Emily O Photography